AWS CWI Inspection
AWS D1.1/D1.1M: 2020
- Defined as the American Welding Society Structural Welding Code- Steel. It describes the welding requirements for steel structures, including statically loaded, dynamically loaded, and tubular structures. It is a code that is intended to be mandatory, and it should be used when so required by a government authority or specified by other mandatory documents.
AASHTO
- Defined as the American Association of State Highway and Transportation Officials. It is a standard setting body that publishes specifications, test protocols, and guidelines that are used in highway design and construction throughout the U.S. It represents air, rail, water, and public transportation.
AWS D1.5M/D1.5:2020
- Defined as the American Welding Society Bridge Welding Code. The preparation of this specification was an attempt driven by the need for common welding specifications for fabrication of steel highway bridges by welding. The Bridge Welding Code is the result of an agreement between AASHTO/AWS to produce a joint AASHTO/AWS Structural Welding Code for steel highway bridges that addresses essential AASHTO needs and makes AASHTO revisions mandatory.
American Society of Mechanical Engineers (ASME) Piping Inspections
- The ASME Boiler and Pressure Code covers requirements for the design and construction of pressure containing components, the care and operation of heating and power boilers, and both fossil and nuclear power equipment.
The American Petroleum Institute (API 1104) Piping Inspections
- The API 1104 contains requirements for qualification of procedures and welders, qualifications of radiographers, radiographic techniques, and weld quality requirements for production welding.
Visual Welding Inspection
Inspector responsibilities before welding:
Review drawings and standards:
- Check the condition and storage of filler metal
- Check the welding procedures and welder qualifications
Inspector responsibilities during welding:
- Check welding parameters and techniques for compliance with welding procedures
- Check quality of individual weld passes
Inspector responsibilities after welding:
- Check completed weld appearance
- Check completed weld sizes and lengths
- Prepare and maintain inspection report
Welding WPS
- To define and document the details that are used when welding specific materials or products.
Welding WPQ
- To prove that the materials and process prescribed in the procedure specification will produce weld joint mechanical properties that meet the application and specification requirements.
Qualifying Positions
- Fillet weld test positions for plate are 1F, 2F, 3F, and 4F
- Groove weld test positions for plate are 1G, 2G, 3G, and 4G
- Fillet weld test positions for pipe or tubing are 1F, 2F fixed, 2F rotated, 4F, and 5F
- Groove weld test positions for pipe or tubing are 1G, 2G, 5G, 6G, and 6GR
- The fillet and groove weld positions are applicable to all the welding processes.
Welding Certification and Qualification
- Tests determine the skill level of welders, and welding operators.
- To produce quality welds with the processes, materials, and techniques defined in the procedures.
- The qualification requirements are normally listed in the contract document.
Destructive Testing
Tensile Testing will provide the following results:
- Ductility
- Ultimate Tensile Strength
- Present Elongation
- Present Reduction of Area Yield Strength
Guided Bend Testing:
- There are three types of transverse weld bend specimens. They are face, root, and side bends. For example, the face of the weld is stretched in a face bend; the root of the weld is stretched in a root bend; and the side of a cross section is stretched in a side bend.
- Most guided bend fixtures utilize a plunger or ram with a matching die that transforms the straight bend specimen into a U shaped test piece.
Hardness Testing:
- Hardness testing is the measure of how resistant solid matter is to various kinds of permanent shape change when force is applied. Macroscopic hardness is generally characterized by strong intermolecular bonds, but the behavior of solid materials under force is complex; therefore, there are different measurements of hardness: scratch hardness, indentation hardness, and rebound hardness.
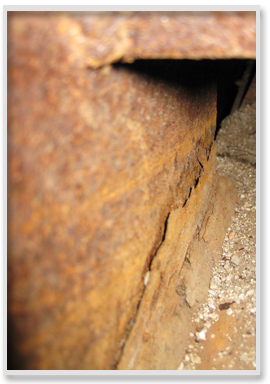
A Certified Welding Inspector performs a visual weld inspection of a fracture-critical bridge member.
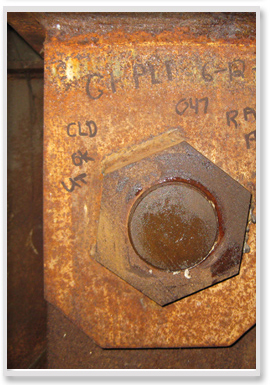
Technician preparing to perform ultrasonic testing of bridge pins on a fracture critical bridge member.
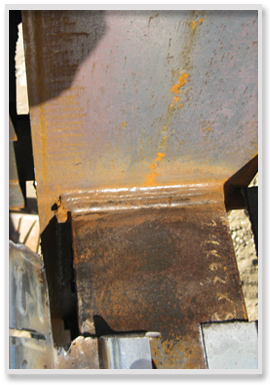
Technician preparing to perform ultrasonic testing of a field welded moment connection on a commercial building.
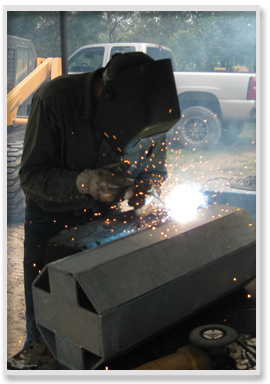
Certified Welding Specialist developing welding procedure for football stadium light pole repair.
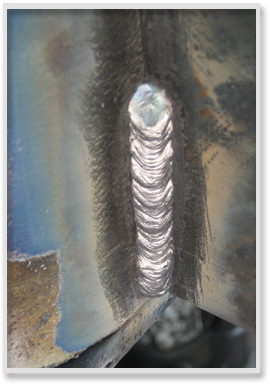
Initial fillet weld on the development of welding procedures.

